As mentioned in my previous post, I installed shock absorbers on the mini-camper. It took a bit of back-of-the-envelope engineering to make it happen, so I thought it was worth sharing how I did it in a stand-alone newsletter entry. ~JRC
Vehicle suspension is all the springy stuff that softens the ride. It has two main components: the springs, either coil or leaf and the shock absorbers. (There are also "struts," which combine springs and shocks plus vehicle structural elements, but I won't go into these here.) The springs hold the vehicle's load and absorb energy from bumps, softening the ride. Shocks act as dampers, smoothing out the spring response.
Simply put, springs take the bumps, while shocks keep the springs - and vehicle - from bouncing and swaying out of control.
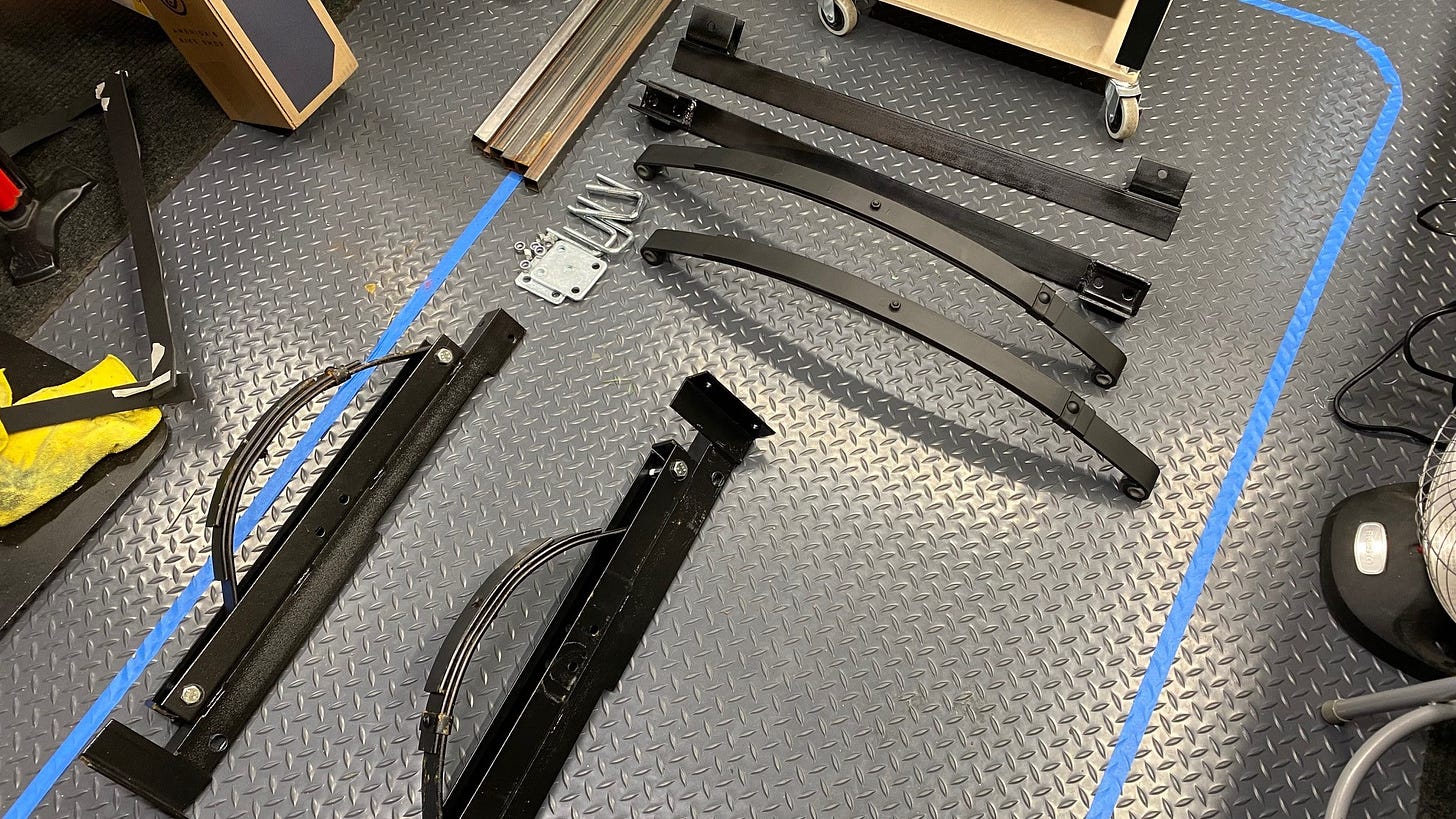
Many basic trailers, often used as foundations for home-built campers, have only simple leaf springs to control the ride. The one I purchased had stiff and noisy springs, making them unsuited for my camper build. So, I replaced them with a set of soft ride springs meant to, as the name suggests, soften the overall ride of the trailer. They worked quite well, so much so that I thought they'd be all I needed.
However, after taking the completed rig on an extensive cross-country test, I realized that springs alone weren’t enough. The camper often swayed after large bumps. While I believe the ride was safe, the shock-less suspension made the ride unpleasant at times and forced me to slow down when navigating difficult roads. Shock absorbers would significantly improve the ride and make the camper all the more suitable for long-haul trips (and the occasional unpaved trail adventure). So, I committed to making it happen.
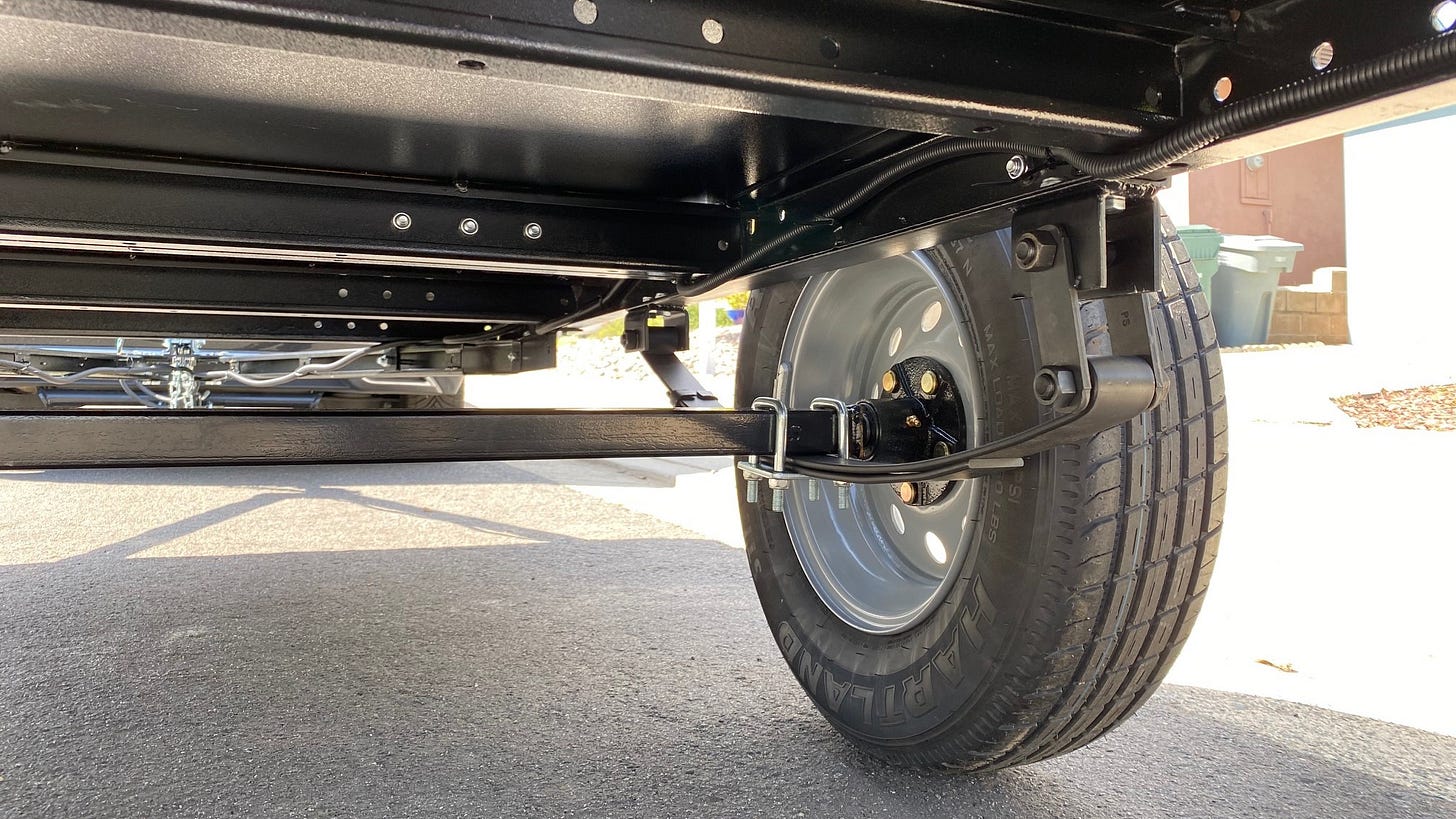
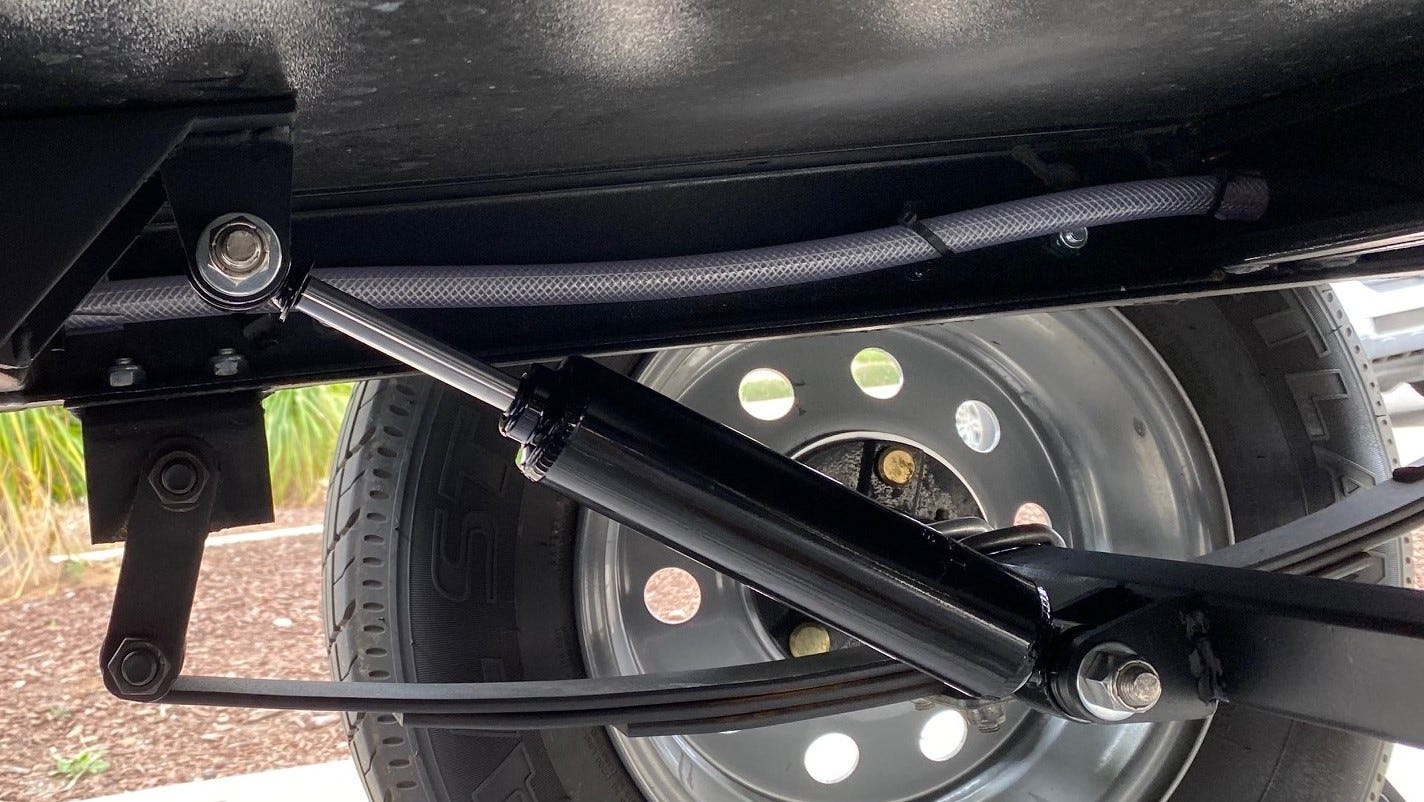
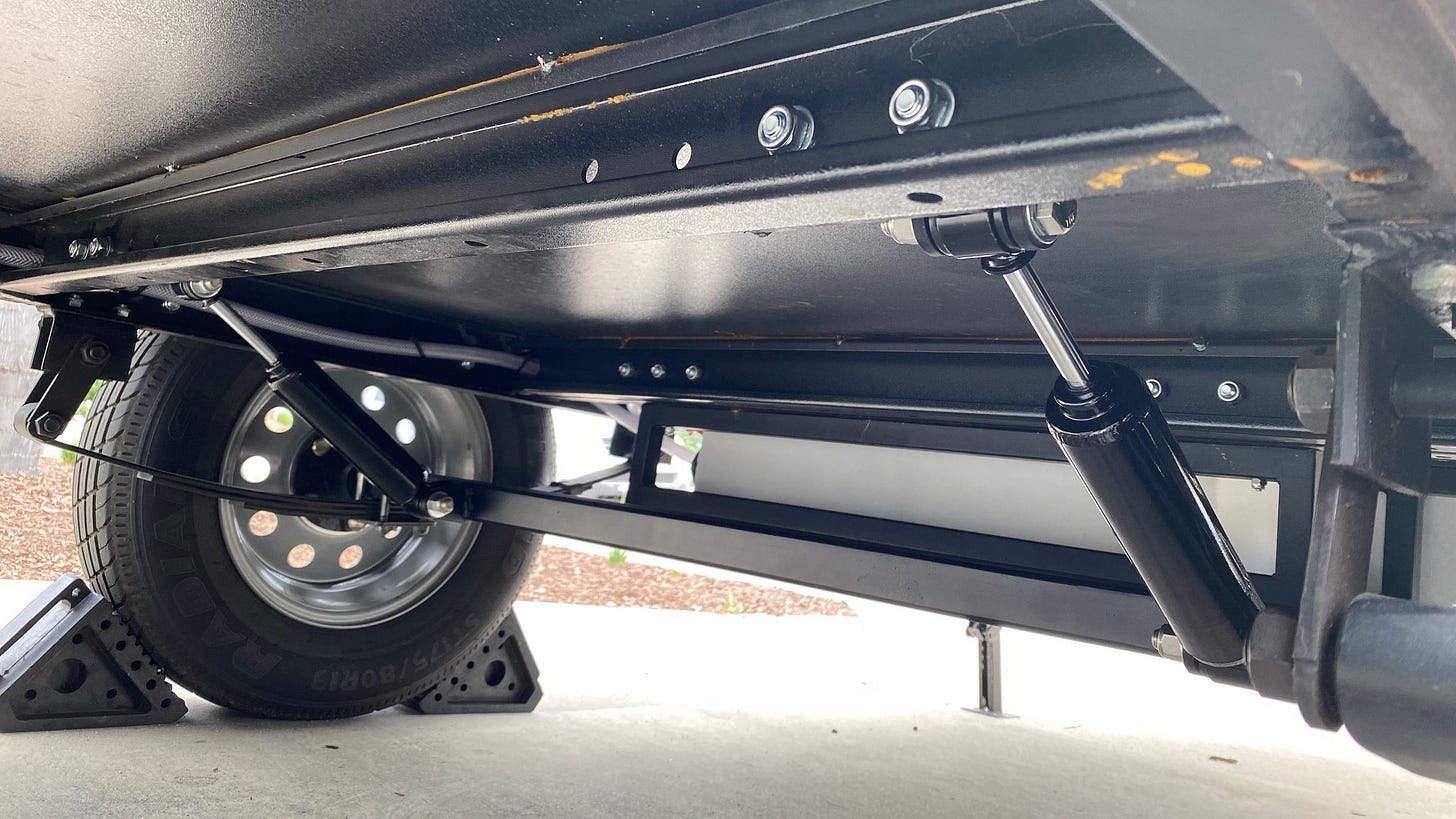
Unlike many camper builds, I lowered my suspension by mounting the axle on top of the leaf springs rather than below. This modification effectively reduced the available space to mount any additional components. As configured, if I installed shocks to the frame's cross member behind the axle, as is often done, the shock's angle to the axle would be far less than 45 degrees, thereby reducing the system's overall efficiency. (Ideally, shocks are mounted at or near 90 degrees to the axle, but this was impossible.)
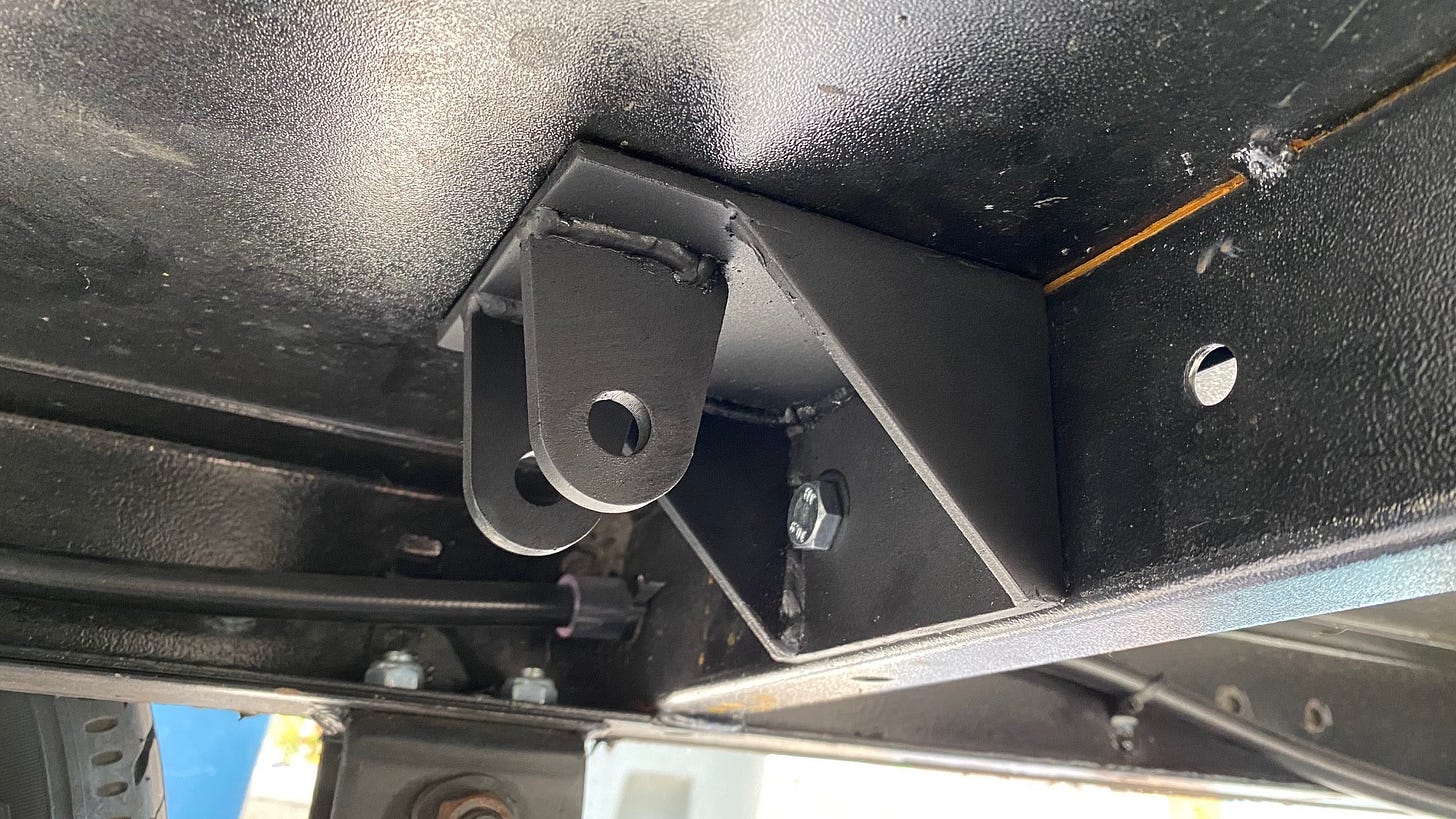
My plan was to fabricate a couple of brackets that moved the top mounting position closer to the axle and higher than the bottom of the cross-member.
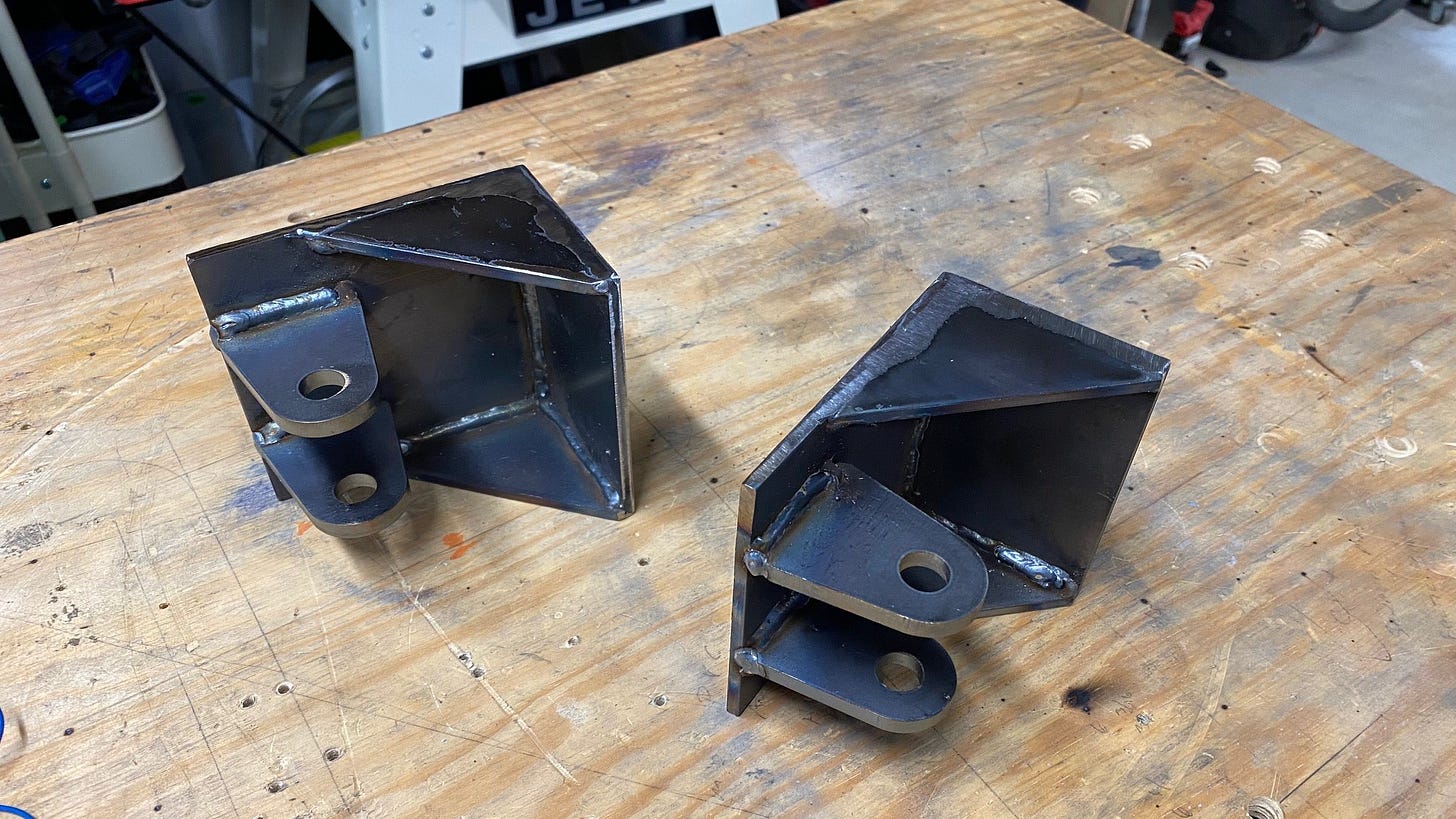
The design: a pair of mounting brackets from 3/16 inch steel plate.
The steel I purchased from a local metal supplier in four-inch squares. For cutting, I used my angle grinder with a cutoff wheel. For welding, I used my 130 amp mig welder.
One four-inch square uncut served as the mounting bracket base, and another I cut to 2 1/2 inches by 4 inches as the back. I then cut two right triangles with 2 1/2 inch sides (right isosceles triangles, technically) for gussets to strengthen the structure.
The base and back I welded together at a 90-degree angle and then welded the gussets to each side. The outer welds I cleaned up with the angle grinder.
For the shock mounting tabs, I purchased pre-cut shock tabs and welded these in place 1 1/2 inches apart (inside width; the standard shock mount spacing).
I also welded identical tabs on the axle in corresponding locations. After cleaning up a few of the less-than-good welds with the grinder, I gave everything an even coat of primer and then a finish coat of black paint. To attach the mounts to the frame, I drilled a pair of holes in the mount backs, drilled the same holes in the frame’s cross-member, and simply bolted them on.
I went with short-length gas-filled shock absorbers commonly used in the frontends of hotrods (those custom cars often without front fenders). These shocks were relatively short but still had enough travel to accommodate the range of motion of my springs.
I attached these using hardened steel bolts with nylon-locking nuts to keep everything in place.
After crawling out from under the trailer, I dropped it off the jack stands and gave it a good shake. At first, I was concerned little had improved. It still rocked easily, and I feared my shocks were too soft. But after hitching it to the car and taking it for a test, I realized my fears were unfounded.
The handling was drastically improved, and after purposefully hitting every pothole, dip, and bump I could find, I realized the shock upgrade was a complete success. Honestly, the ride was like night and day. Not only did it sway less, but the trailer felt way lighter behind the car because it was no longer pushing and pulling, as it did with all the undampened bouncing and swaying before.
The hardest part of this build was coming up with a plan. Well, that and all the cutting and welding to make it happen. It's messy work, using metal. But well worth it.
In retrospect, I should have either jacked the trailer up higher or removed the axle entirely to weld the tabs on the axle. Instead, I struggled needlessly in the cramped space, trying to weld the tabs on while upside down with sparks flying down my shirt. Experienced welders probably would have no trouble doing so. But I am by no means an experienced welder. As it was, I ended up making a few messy welds that, while strong, look crappy. Sure, no one will see them, but I know they're there, and it erks me a bit. (Yes, managing my neurotic perfectionism is a lifelong battle.)
A bit of grinding and a decent paint job helped matters a bit, thankfully. And with the shocks attached, it looked rather good overall. Best of all, the project improved the camper's ride significantly, and that's the most important part.
Until next time.
JRC





Really liked the last two posts - I'm sure this will be a story your son will remember. Take it to Laguna and do some riding!
Sounds like a shocking success! 😊