Happy Friday! I prepped this email in advance because, as the title indicates, I’ve gone on a small trip with the mini-camper over to my favorite spot in the Mojave Desert. The weather is going to be perfect - seventies in the day and low fifties at night. It’ll be a bit windy, but I love being rocked to sleep (who doesn’t?), so it’ll be pleasant.
This is only the third time I’ve taken out the camper, so I should learn a few more things about it that I’ll share. It’s also the first trip since installing the shocks, so I will also report on the (hopefully) improved ride. This trip will take me across some busy California highways, then on to far more fun mountain roads and even a bit of gravel and sand trail. It’ll be another real test, so I can’t wait to share.
For now, please enjoy this repost on the camper build. And as always, thanks for reading and joining me on the adventure! ~JRC
Editor’s note: This story is so long it likely will be truncated in your email. You can always click on the title above, which takes you to my substack, where you can read the entire story. And while there, you’ll able to click the like button if you are so inclined. It seems small, but it means a great deal to me when those who do do. Thank you!
What I'm making: compact camper trailer!
A walk-through, start to finish
First published June 30th, 2023
Since seeing a "teardrop" camper on the road decades ago, I've thought about how fun it would be to see the country with something similar in tow. But back in the day, cost prohibited me from buying one outright, and limited skill and shop resources precluded me from fabricating one myself. It wasn't until last year that I earned the skill and had the time and tools - to create my very own compact camper.
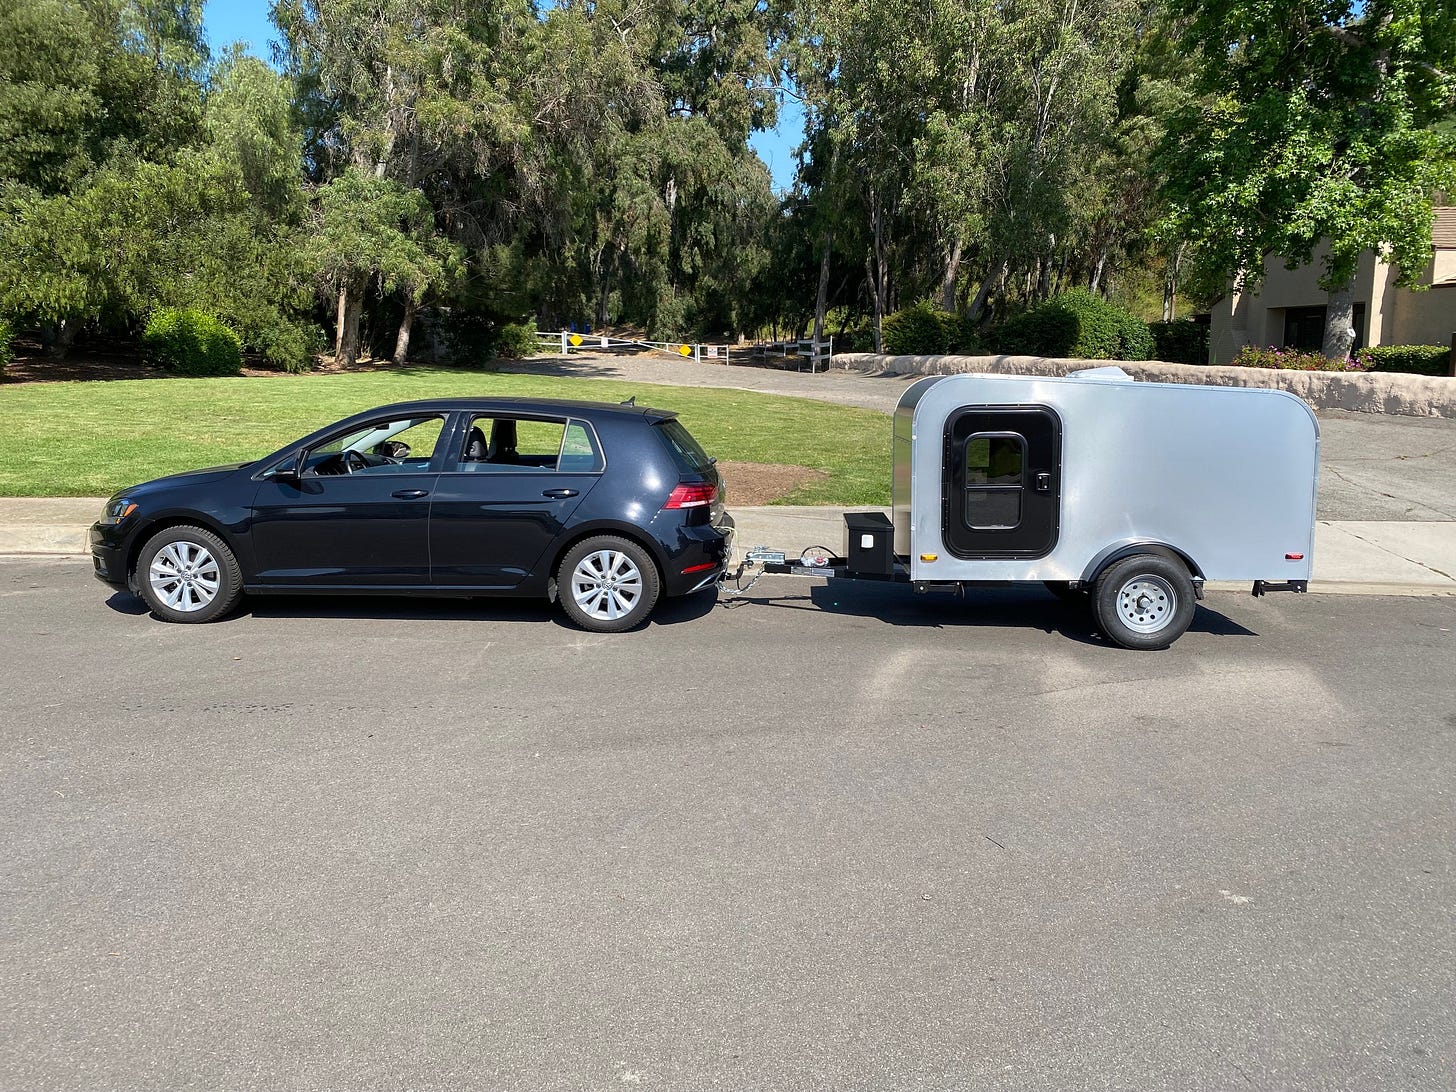
An ideal camper for me has a tiny footprint and overall ultra-light configuration. So for this build, I aimed to create something I could tow behind anything, including my VW Golf. Yes, that's right - my RV objective is the opposite of many campers on the road today, those behemoths towed behind another behemoth (often pulling another behemoth at the tail). I understand the allure of these home-away-from-home setups. But these road trains, to be honest, freak me out. Managing all that weight, volume, and responsibility on today's highways? Not for me.
In contrast, I want a setup that is easy to tow, stow, and no-fuss-fun to use - all paired with my Golf, an economical car. This auto is safe, capable, and has no problem pulling a modest trailer.
If you have your doubts, you’re not alone.
Here in the US, there's a misconception one has to have a full-size pickup to tow anything. But it's a whole different story in Europe. Virtually no one has pickup trucks "across the pond," but they still manage to move materials and resources around, often with utility trailers and whatever vehicle is available. The Brits, in particular, love RV camping, just like us. They call it "caravaning" and do so often with small cars like the VW Golf.
So the heck with US conventions; I'm going small.
It's taken me several months to complete my camper, consuming hundreds of hours. Honestly, I underestimated how long it would take (this is normal for me). And I have been obsessively meticulous, adding to the time as well as cost (again normal). But as I near the finish line and start fantasizing more about the upcoming trips my son and I will take, I've come to embrace how worthwhile this has been (and will continue to be over the years, I hope).

I went with a custom design due to my rather strict requirements (and I couldn't find anything I desired to copy). I didn't want a standard teardrop with the galley in the back. Instead, I wanted the kitchen inside, making the camper more usable year-round. With few options to emulate, I ended up winging most of the design.
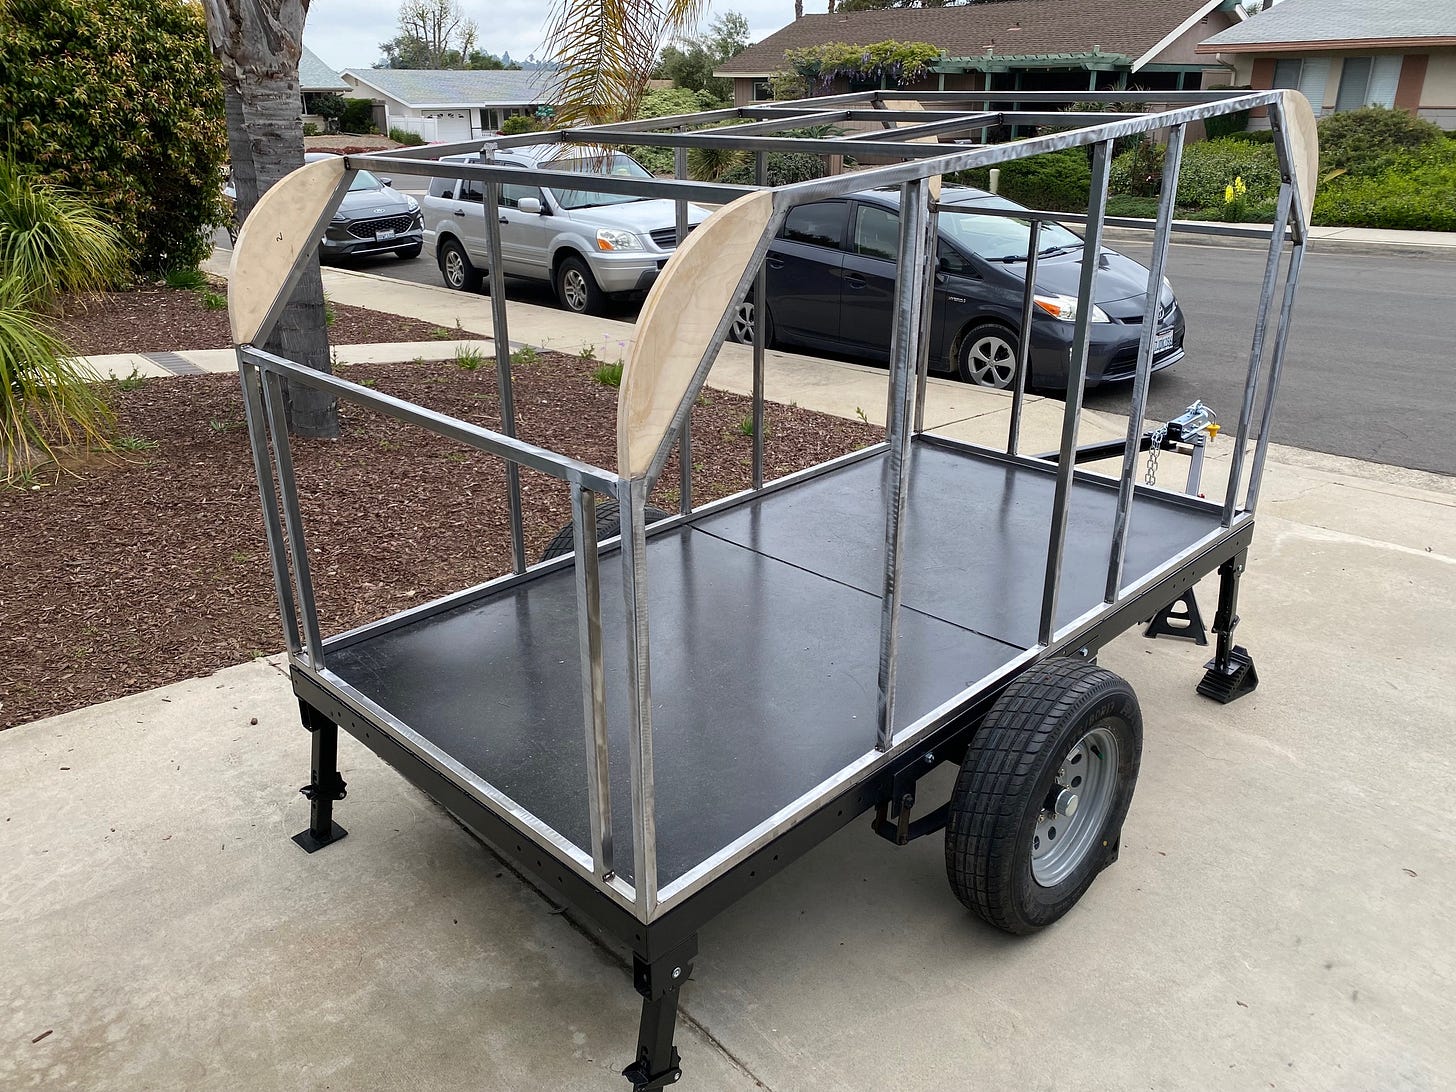
Like other home-built designs, I started with a flatbed kit trailer I purchased online. The kit went together quickly with my friend Jack's help and company.
After which, I scrapped the shoddy leaf springs and tiny wheels that came with it. For new wheels, I went with 13" rims and corresponding tires that matched the overall diameter of my Golf's wheels. And for springs, I purchased a pair of soft ride leaf springs and hangers from Compact Camping Concepts (CCC) in Oregon.
Scott, the owner of CCC, was a huge help in talking me through this early stage. (It sounds like he is one of those enthusiasts-turned-small business owners, making his passion into his livelihood. A great guy, for sure.)
Homebuilt small campers often use 1/2" to 3/4" plywood and forego an exterior-frame-interior design commonly employed in home construction. The thick plywood supplies the rigidity and exterior layer, making it easy to build but adding substantially to the weight. I needed similar strength but wanted an insulated interior and an ultralight design. So I opted to frame it out in 1"x1", 16-gauge square steel tube.
This stuff is super strong and light, making the finished frame less than 70 lbs but completely rigid. Plus, the process allowed me to weld up a big project, something I've been dying to try since learning to weld a year ago.
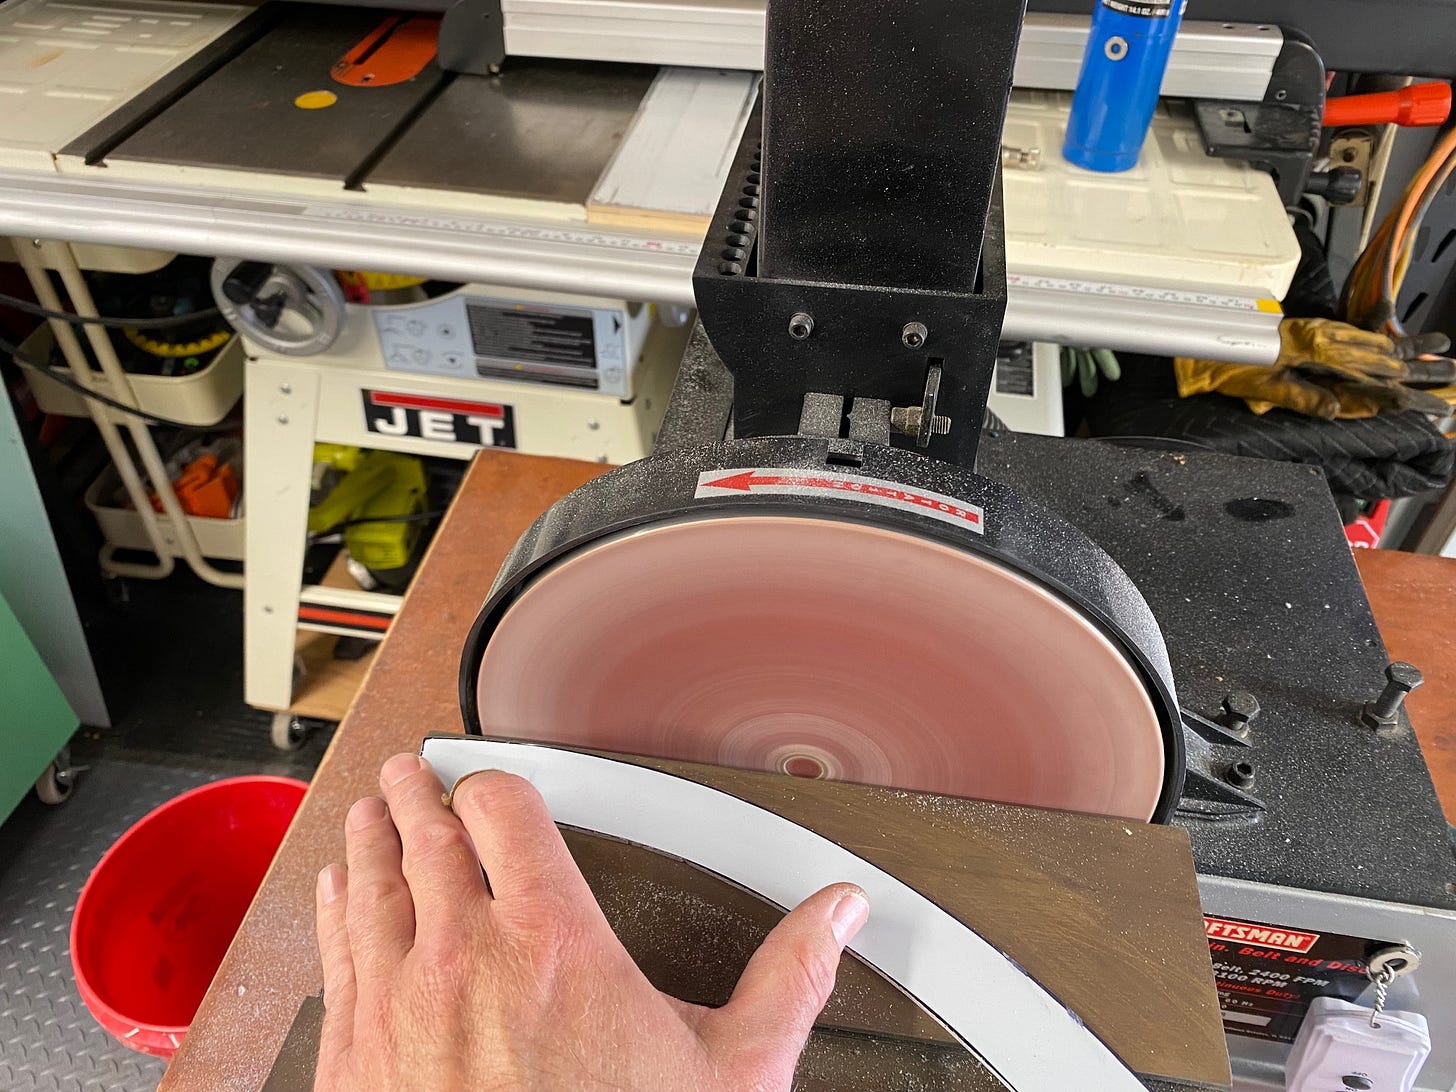
A rather unique aspect of my design is the tight radii on the front and back. These are 12", far tighter than the swooping curves on a teardrop. I couldn't bend the steel tube that tight, so instead, I created epoxied plywood arcs and screwed them to the steel. I also added numerous poplar wood cross members to frame out the spaces for windows, hatches, and doors.
I used 1/4" baltic birch plywood glued and screwed to the frame for the exterior. For the radii in the front and back, I "kerf cut" the plywood allowing me to bend it and attach it to the frame.
I then patched all the seams and screw holes and coated the wood with penetrating epoxy sealer creating a waterproof sublayer.
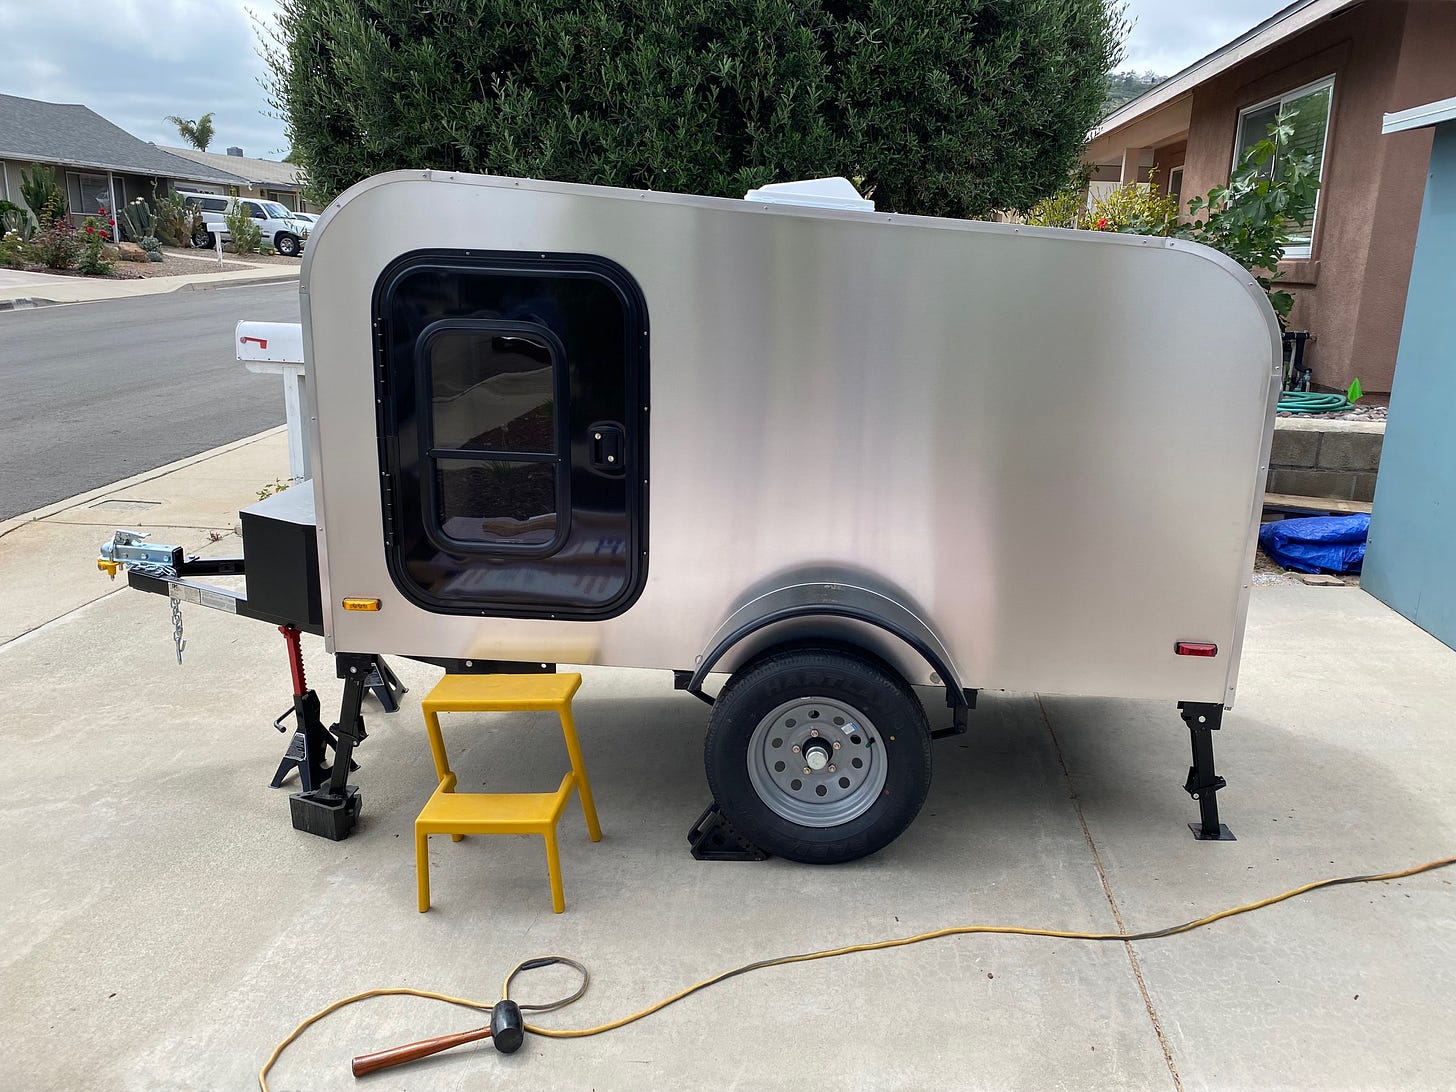
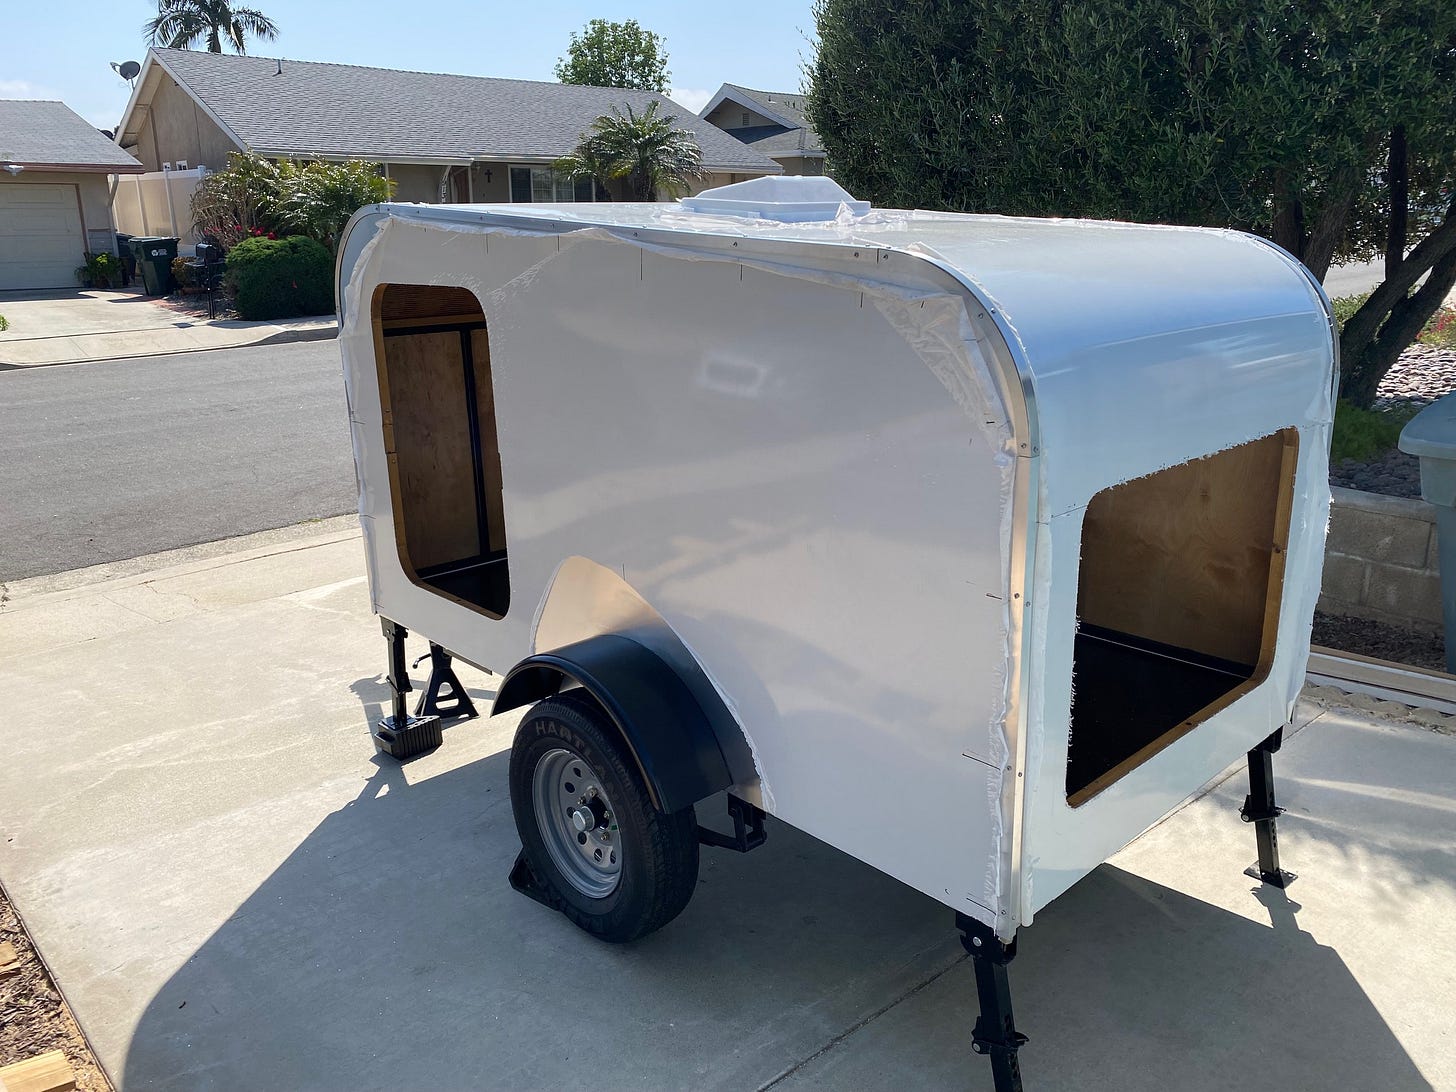
I chose to "skin" my camper in 0.04" thick 3003 aluminum because 1) it's more economical than many solutions like fiberglass, and 2) I love the retro "Airstream" vibe it has. I custom-ordered the aluminum in 5'x10' sheets so that I could have seamless sides. (The camper's profile is slightly bigger than 4'x8', so I couldn't use the more standard-sized sheets).
For cutting, I used a router with a flush-cut bit. The bit has a bearing that rides along the frame, with the cutting edge above trimming the aluminum to the exact shape. The sheets were difficult to handle, so my buddy Jack came over again and helped me align, attach, and cut it all (thanks, man!). Cutting out the openings was easy because I spent time framing these first, as mentioned.
I used 1" angle aluminum to edge the exterior's straight sections, sealing them and attaching them with stainless steel screws.
For the tight curves, I had to machine custom aluminum arcs for the sides; pairing these with flat aluminum stock that I bent around the top radii, and I sealed the two parts together at the edge with grey calk.
The fenders I obtained were bare metal. I drilled holes in these for mounting and then had the pair powder coated in black at a local shop. Olympic Coatings did a flawless job at an incredible price.
There are four openings to the outside which I paired with commercially made components:
A 36" camper door with a window
A matching window on the opposite side
A roof vent
A rear hatch
Incidentally, I purchased the door from OverlandTrailer.com, another small business catering to the custom small camper community. Like Scott at CCC, Ryan and Mark at Overland were great help early on. I had an issue with the door, and they went out of their way to help me get things right. The two also provided valuable pro-bono feedback on my design. It seems like being helpful and supportive is part of the ethos of the tiny-camper community. I love it.
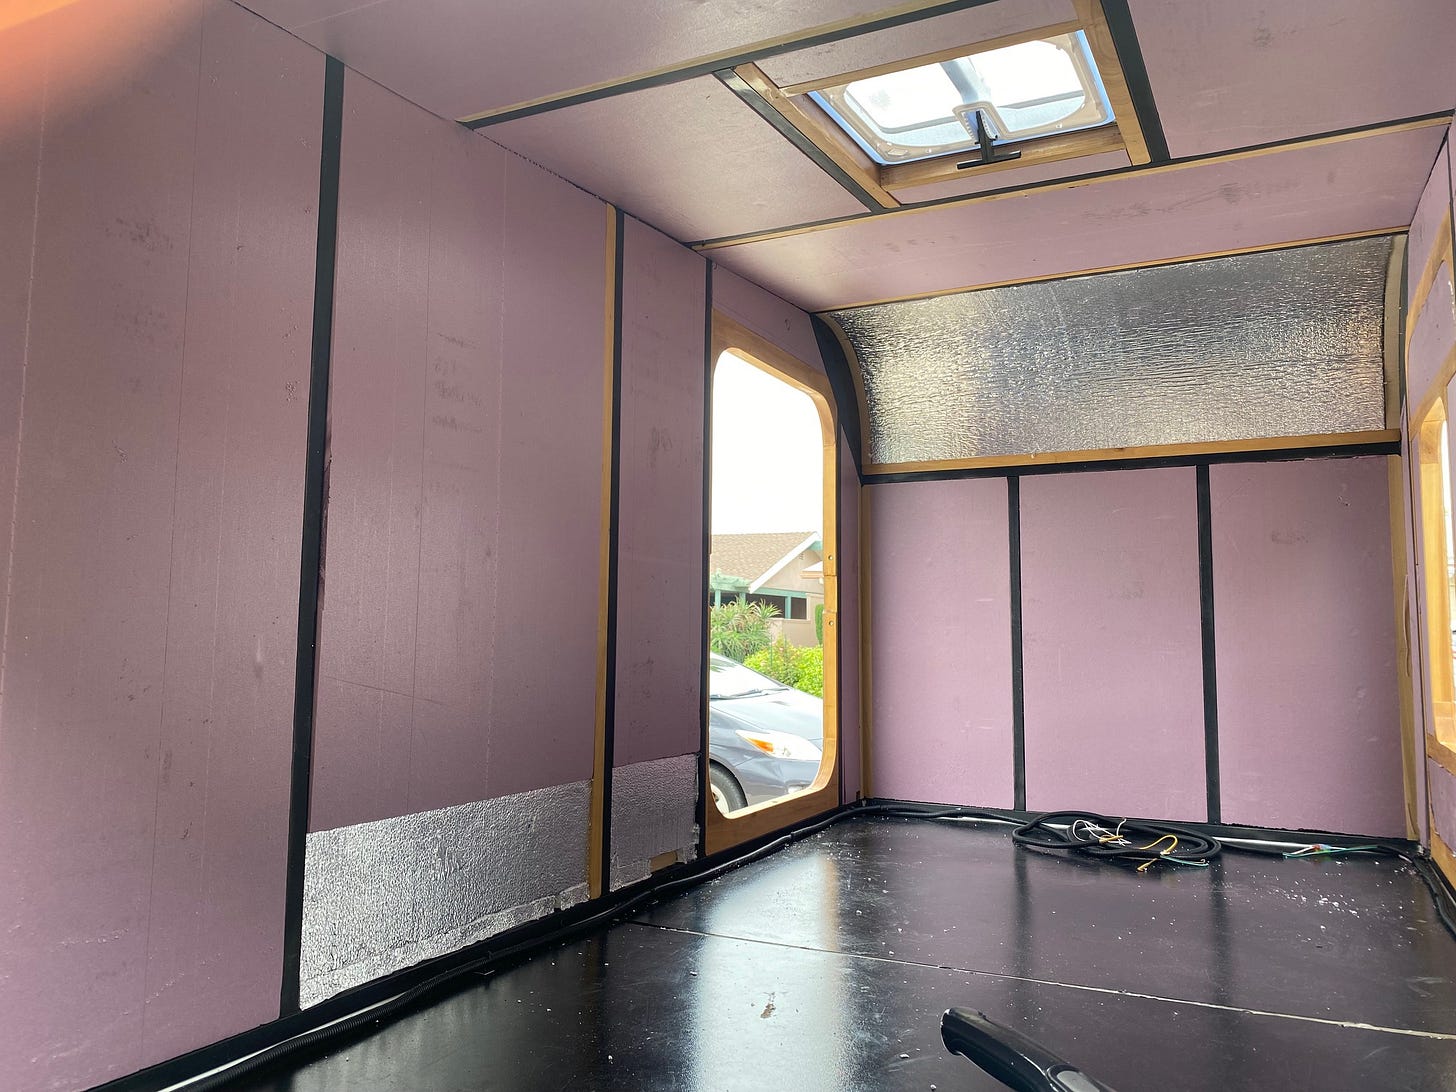
Inside, I used 1" foam for insulation, with 1/2" in a few areas with less space (e.g., where the fenders are mounted), and two layers of 1/2" for the curved roof sections.
After insulating it, I ran wiring for the lights, outlets, fan, and other components. I also chose to run the exterior light system inside, drilling holes through to the outside for the tail and side lighting.
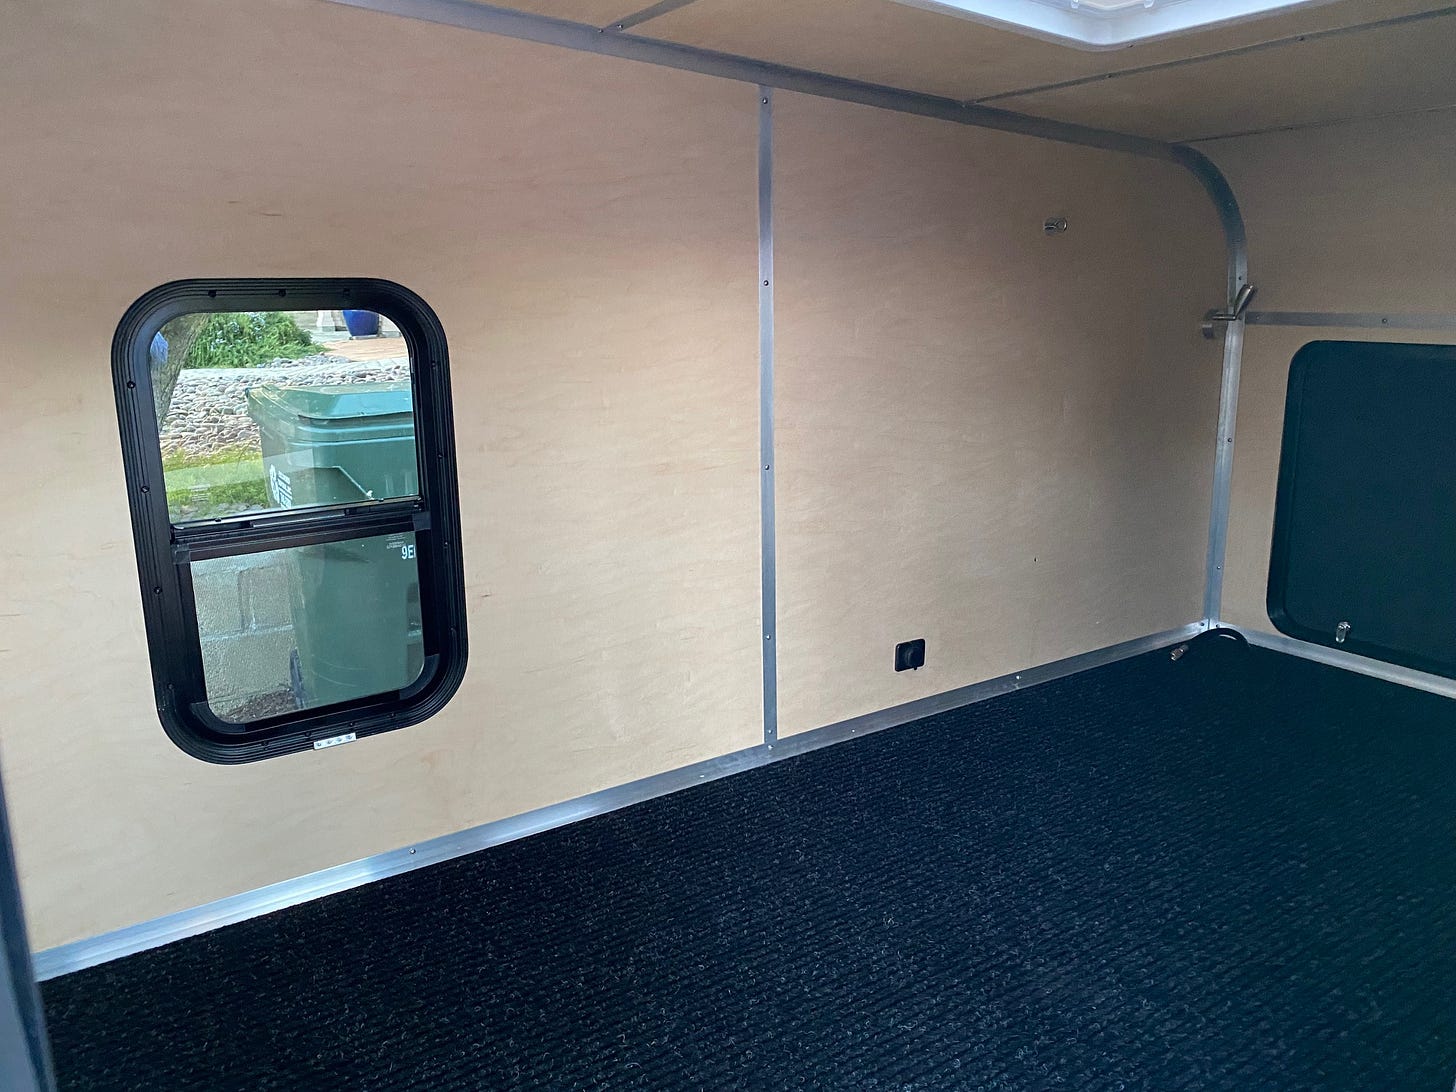
The interior paneling is 1/8" maple plywood, which I am leaving natural with only a paste wax finish.
I trimmed out the inside exactly like the exterior in aluminum. This creates continuity between the two, and I like the contrast between the wood and metal.
The floor is raised and removable, so I could route all the wiring but have easy access for repairs and future modifications. It, too, is insulated and covered with an indoor/outdoor carpet mat I cut to fit. The rug is heavy and stays in place without gluing or stapling.
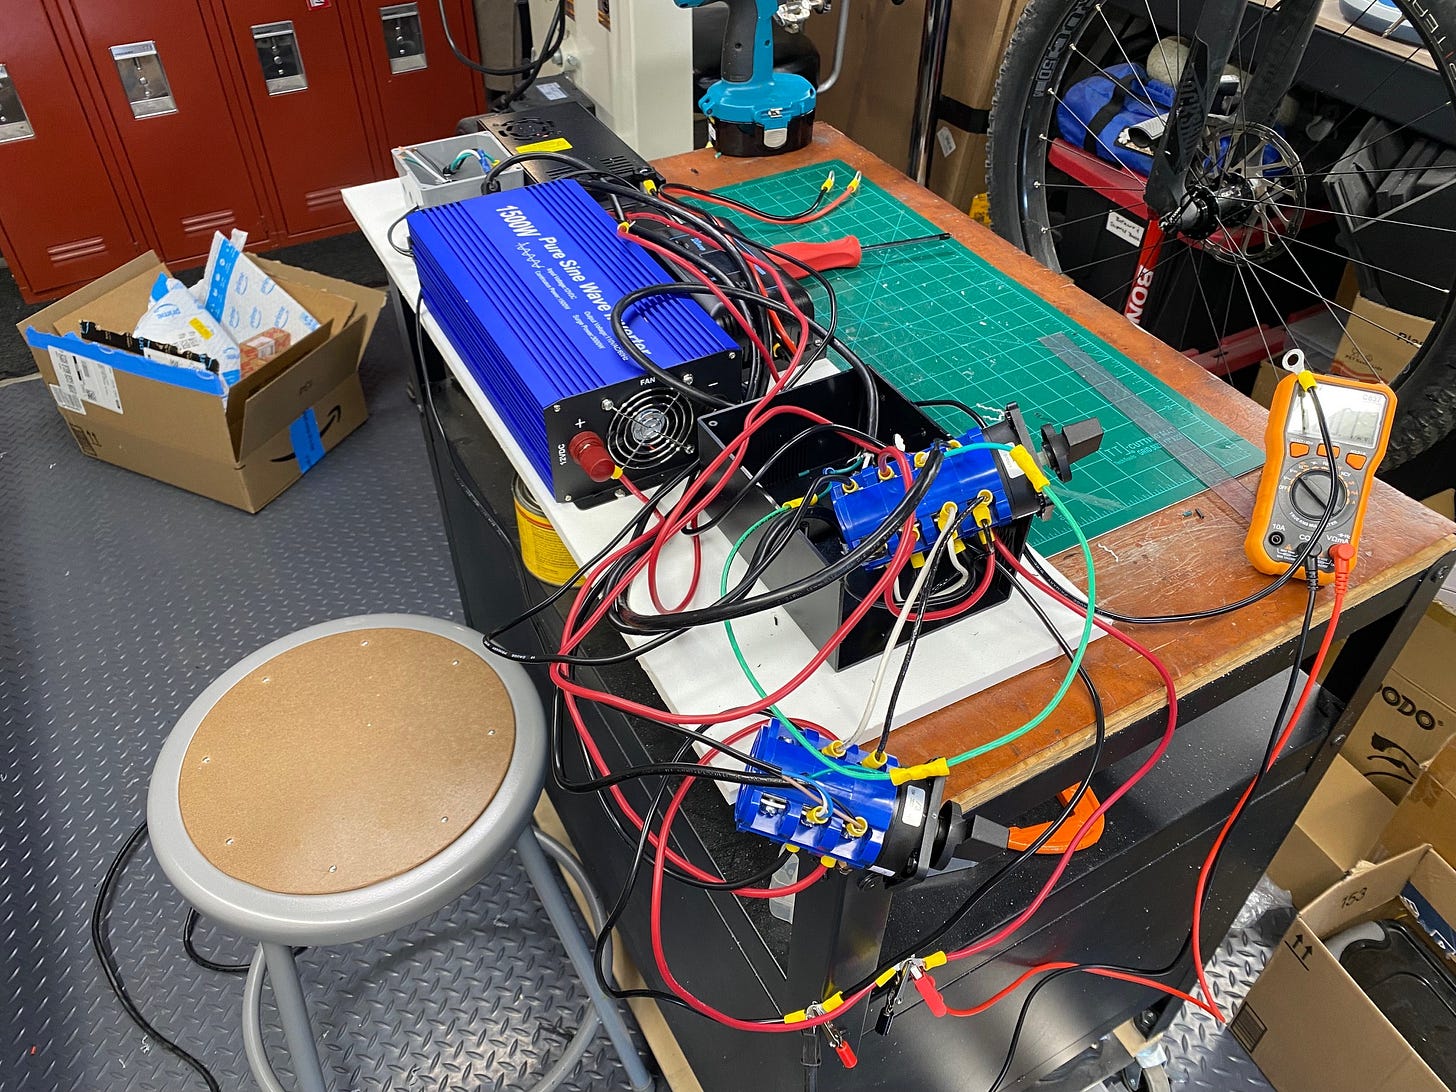
The electrical system was quite the job, owing to the complexity of making it both battery and "shore" powered. This means I can run the system off-grid or plugged in when power is available (i.e., in a campground).
To configure the system, I had to interconnect all the devices that convert or invert power between AC and DC. Again, I couldn't find plans for what I wanted, so I researched and devised my own system.
Getting it all hooked up was a job, and running both DC battery and AC power into it simultaneously for the first time was a scary proposition! But it worked flawlessly, and I am so happy with how it turned out.
The final setup will have a folding bunk to add more usable space inside. As you can see, there is no room for a person under the bunk. Instead, I set it up like a "mezzanine," creating a tiered sleeping arrangement for two with about 8" of storage height under the bunk side. (And I'll likely add some shelving somewhere later.)
And in the back - the kitchen! The trailer has a gas stove supplied with propane via a tongue-mounted tank and a sink with running water delivered through an electric pump.
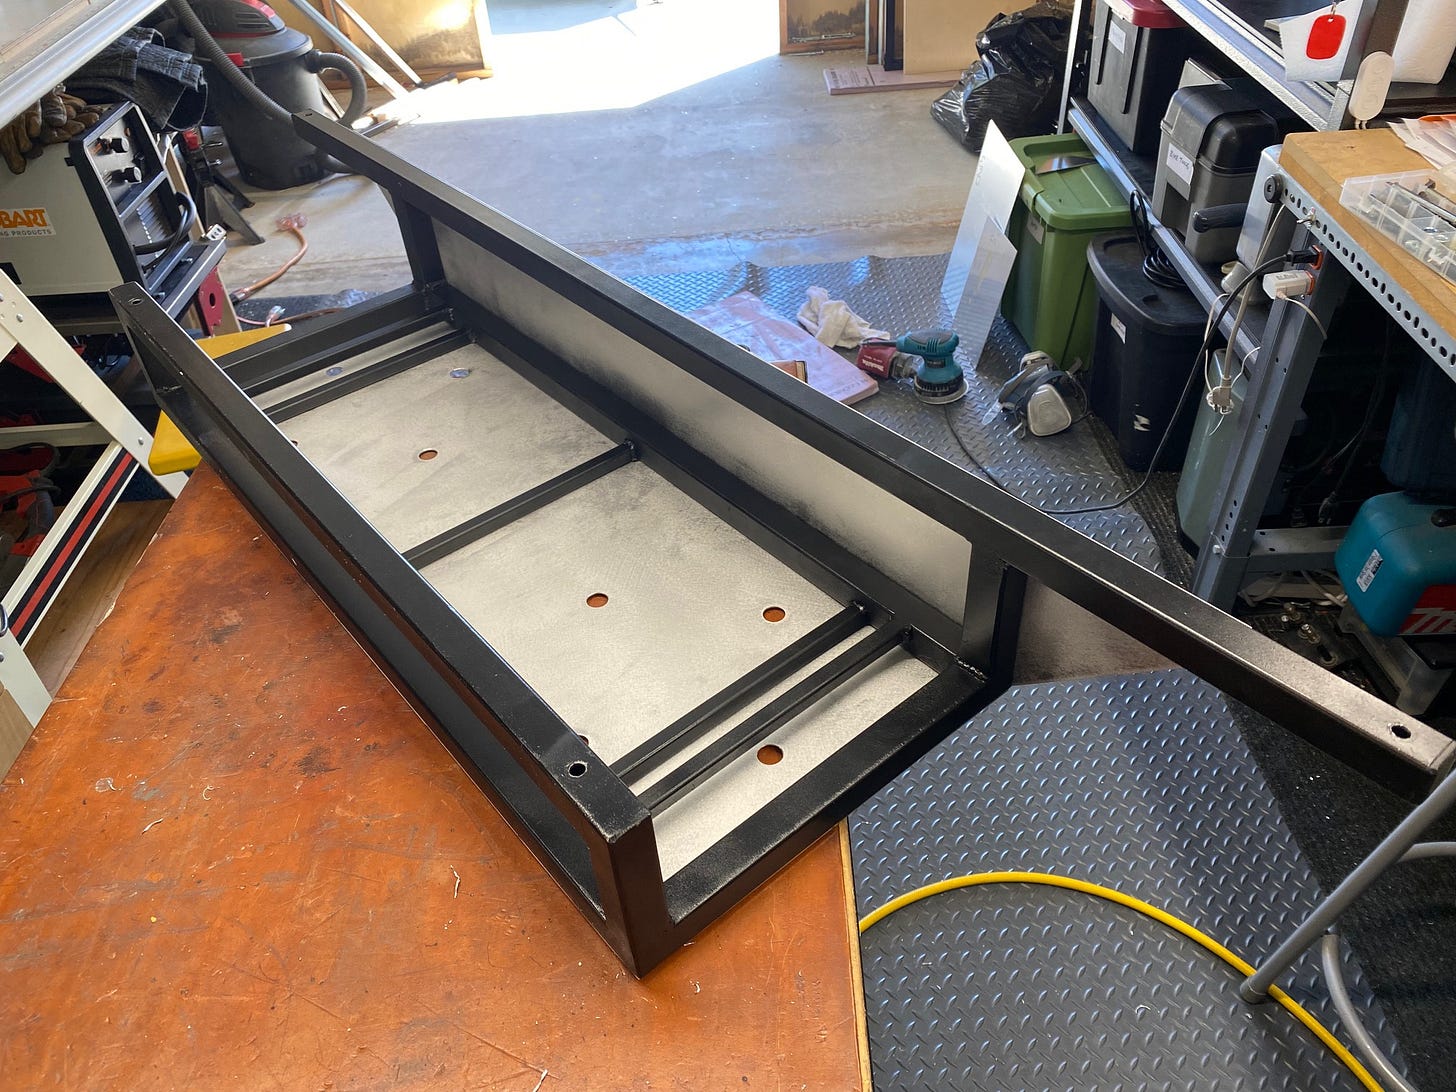
The water storage I attached underneath with a custom steel cage with aluminum skid plates.
There is more to do, including finishing the exterior trim and attaching a spare wheel somewhere. But I'm almost there. Just today, I visited another local small business owner, Amber of G.Inspire, who is making my custom sleeping cushions for the interior. She does excellent work and helped me select the perfect cushion fabric. I'm very excited to add these to the tiny but cozy interior (and so happy to support yet another small business in the process). These and other final additions will undoubtedly make this little camper feel like a tiny home.
For those interested, here are the overall stats.
Dimensions:
The total length is about 12' long, from tongue to back.
The cabin is roughly a 4'x8' footprint with an average of 4' headroom inside.
The trailer stands about 5.5' at the tallest point outside and has about 10" of ground clearance measured at the spring mounts, the lowest point.
Wheel space, outside tire to outside tire, is 64."
Dry weight: ~980 lbs.
Build time: ??? I lost track at about 200 hours.
Cost: ??? If I had to sell it and make a modest profit, I'd say about 25K. There are commercially available cheaper ones, but this is one solid custom build. Worth it?
That's it for the first walk-through, start to finish, on the new mini camper trailer. I plan to affix a QR code on the outside; interested people can use it to go to my website, where I'll have a dedicated page for this build.
On the page, I'll have a sign-up list where people can state interest and whether they'd like plans or possibly even a contracted build at some point. With enough interest, we'll see where this goes. I must admit there are much cheaper and simpler builds, not to mention many prebuilt options, some very economically priced ones. My design might not fit the bill for many out there, but maybe, just maybe, there is someone who'll appreciate it as much as I do.
This is definitely a niche within a niche build. But I feel it offers several unique features in a genuinely solid-but-light-and-compact design. I'm super happy with how it turned out, and so is my son, so I guess that's what matters most.
One last thing: a name. I don't have one for it.
To be clear, I don't mean a name like "Betty Sue," "Screaming Road Devil," or some such WWII fighter plane-esque kind of name. Instead, I was thinking of a descriptive model name, like Airstream, Winebego, or @TAB. Whether I end up making plans, kits, or even finished campers available, it seems like such a build deserves an appropriate moniker. (The pic folder in which I saved all of my images of this build is labeled "Ecostream," but I'm not sold on it by far. There might be some copyright infringement concerns, too.)
If you have a name idea, please share in the comments!
As always, thanks for reading. And thanks so very much for taking an interest in what I make here at J ROBERT CLARK - Makes.
Until next time.
JRC


